
A Stripe dashboard clone lets you manage payments, customers, payouts, and subscriptions in a branded interface you control. This guide covers architecture, APIs, webhooks, security, and a step-by-step build tutorial using Rocket.new.
Build a stripe dashboard clone without burning weeks on development. This guide covers search intent, architecture, authentication, Stripe APIs, webhooks, subscriptions, analytics, security, and a step-by-step build tutorial, everything teams need to ship a production-ready payment dashboard quickly.
What Is a Stripe Dashboard Clone?
A Stripe dashboard clone is a custom web application that recreates the core functionality of the Stripe Dashboard, allowing businesses to manage payments, customers, payouts, refunds, subscriptions, and analytics through their own branded interface.
Unlike the hosted Stripe Dashboard, a clone gives teams full control over the UI, data display, user roles, and business logic, without being locked into Stripe's default views.
Why build one instead of using Stripe's hosted dashboard?
- You need a white-labeled interface for clients or end users
- You want to combine Stripe data with other business data sources
- Your team needs custom role-based views (finance vs. support vs. admin)
- You are building a SaaS platform where customers manage their own payments
- You need a branded portal for a marketplace or multi-vendor setup
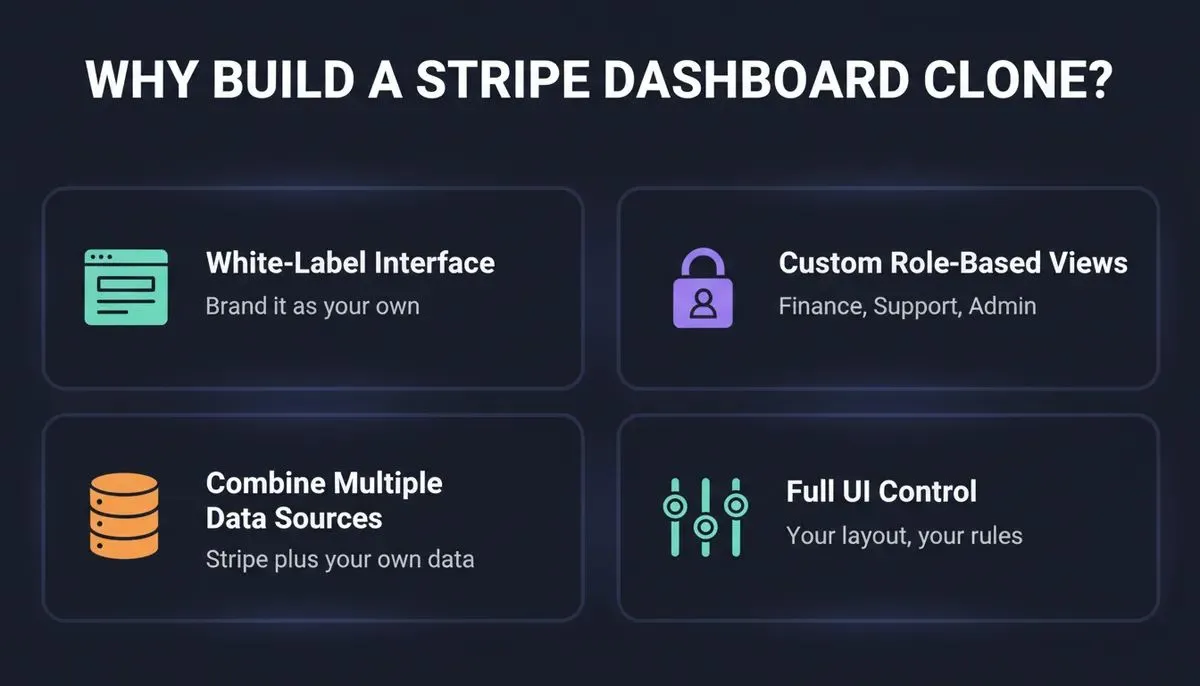
Four core reasons teams choose to build a custom Stripe dashboard clone over using Stripe's hosted interface.
How Many Businesses Use Stripe?
~1.35 million live websites use Stripe globally, with payment volume and enterprise adoption growing year over year.
That scale makes a well-designed stripe dashboard not just useful but essential for any business processing digital payments at volume. Beyond raw adoption, over 90% of SaaS companies rely on subscription billing models that require dedicated payment management views. And with digital payment transaction values projected to exceed $20 trillion globally, the demand for custom payment dashboards is only accelerating.
Stripe Dashboard Clone vs Building From Scratch
Before choosing an approach, teams need to understand the real tradeoffs.
| Factor | Clone (AI-Built) | Build From Scratch |
|---|---|---|
| Development time | Days to weeks | Weeks to months |
| Maintenance burden | Low | High |
| Upfront cost | Low | High |
| UI flexibility | High | Maximum |
| Scalability | Production-ready | Depends on architecture |
| Stripe API coverage | Core flows covered | Full custom control |
| Team required | 1 person with AI tools | 2 to 4 developers |
For most teams, an AI-generated clone covers 90% of needs at 10% of the cost and time.
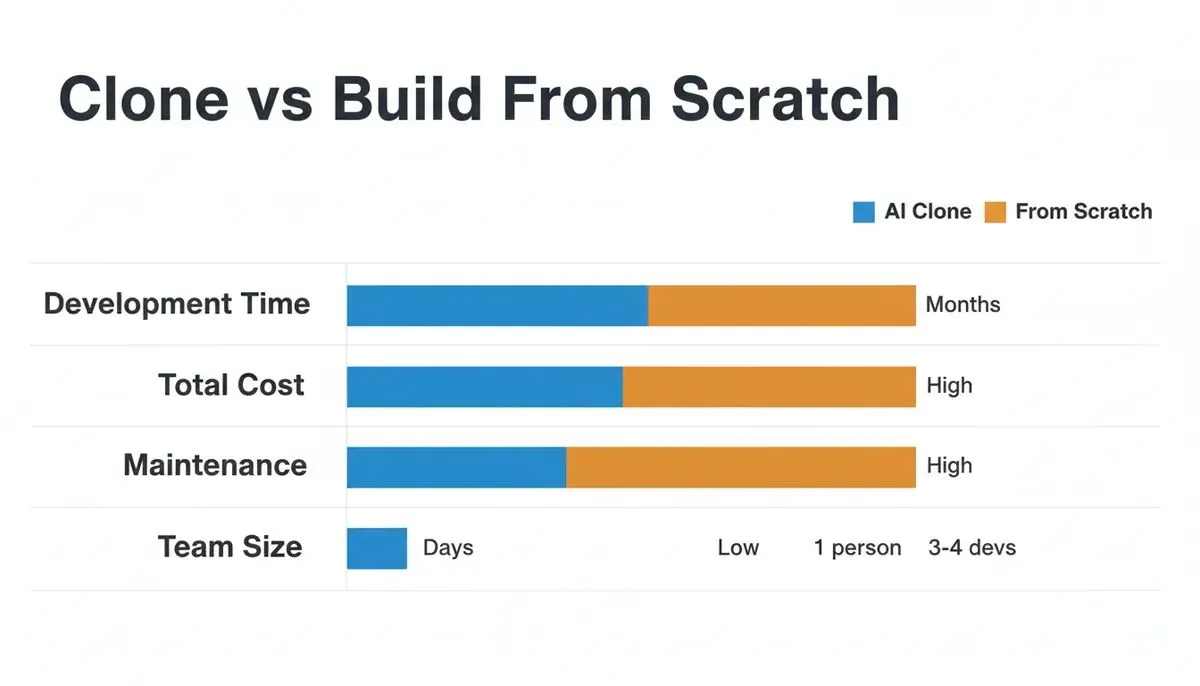
Clone vs Build From Scratch data chart comparing development time, cost, maintenance and team size
Stripe Dashboard Clone vs Stripe Embedded Components
Stripe offers Embedded Components, pre-built UI widgets you can drop into your app. Understanding when to use each approach saves significant time.
| Scenario | Use Stripe Embedded Components | Build a Custom Clone |
|---|---|---|
| Need a quick payment UI | Yes | No |
| Need full brand control | No | Yes |
| Need custom data combinations | No | Yes |
| Multi-vendor marketplace | Partial | Yes |
| Internal admin tool | No | Yes |
| SaaS customer portal | Partial | Yes |
| Need custom analytics | No | Yes |
Rule of thumb: Use Stripe's embedded components for simple checkout flows. Build a custom stripe dashboard clone when you need branded, multi-data, or role-specific views.
Who Needs a Stripe Dashboard Clone?
Understanding your use case determines the features you need.
- SaaS companies: subscription management, MRR tracking, churn analytics, upgrade/downgrade flows
- Marketplaces: multi-vendor payouts, Stripe Connect dashboards, split payment tracking
- Agencies: client billing portals, invoice management, payment history per client
- Subscription businesses: recurring billing, dunning management, failed payment recovery
- Internal finance teams: revenue reporting, reconciliation, payout scheduling
- Admin portals: full payment oversight, dispute management, refund processing
- Enterprise operations: audit logs, role-based access, compliance reporting
- Creator platforms: donation tracking, membership billing, payout management
- B2B companies: invoice-based billing, net-30 terms, ACH payment tracking
- Ecommerce operations: order-level payment data, refund analytics, fraud monitoring
The First Section: Planning the Dashboard Structure
Start with the first section of the dashboard. This is the default view users see right after signing in, so it must feel clear and calm.
This section usually shows:
- Current business performance
- Revenue summary
- New payments
- Balances and payouts
Most teams prioritize revenue, followed by failed payments and payouts. That order works well — it shows earned revenue, issues that need attention, and cash outflows. When this section feels right, the rest of the dashboard becomes easier to trust.
Core Features to Include
A stripe dashboard clone requires specific features to feel familiar and trustworthy. These features help teams move fast without second-guessing the data.
Payments and Customers
The dashboard should clearly display payments and customers. Each payment requires details such as amount, date, and status. The required status for the customer account should remain visible to support teams so they can resolve issues faster.
Payouts and Balances
Payouts matter. A lot. Users want to know exactly when funds reach their bank account. The dashboard should display balances, upcoming payouts, and completed payouts in a clean layout.
Refunds and Disputes
Refunds should never feel complicated. Full or partial refunds can be processed in just a few clicks. The dashboard should also help investigate failed payments and guide teams to resolve disputes quickly.
Subscriptions and Billing
For SaaS and subscription businesses, the billing section is critical. The dashboard should display active subscriptions, billing cycles, upcoming renewals, and cancellations. Invoice generation and delivery should be automated, customers expect a PDF receipt after every charge.
Analytics and Revenue Metrics
A stripe dashboard clone without analytics is just a list of transactions. Build in the metrics that actually drive decisions:
- Monthly recurring revenue (MRR): the lifeblood of subscription businesses
- Annual recurring revenue (ARR): for forecasting and investor reporting
- Failed payment rate: signals churn risk and billing health
- Refund rate: flags product or fraud issues
- Churn rate: subscription cancellations over time
- Revenue trends: daily, weekly, monthly views
Stripe Dashboard Clone Feature Comparison
| Feature | Basic Clone | Full-Featured Clone | Enterprise Build |
|---|---|---|---|
| Payment list view | Yes | Yes | Yes |
| Customer search | Basic | Advanced filters | Role-based views |
| Payout tracking | Yes | Real-time | Multi-account |
| Refund processing | Manual | One-click | Automated rules |
| Subscription management | No | Yes | Full lifecycle |
| Invoice generation | No | Yes | Custom templates |
| Role-based access | No | Yes | Granular permissions |
| Mobile-ready UI | Partial | Full | Optimized |
| Multiple Stripe accounts | No | Yes | Yes |
| Analytics dashboard | Basic | MRR/ARR/Churn | Custom reports |
| Webhook handling | No | Yes | Event-driven |
| Audit logs | No | Yes | Compliance-grade |
Authentication and Access Control
Authentication is the first thing to get right. A payment dashboard with weak auth is a liability.
Authentication options for a Stripe dashboard clone:
- OAuth: social login via Google, GitHub, or Apple (Supabase Social Auth handles this)
- API Keys: for programmatic access by internal tools or integrations
- Session handling: JWT tokens with refresh logic to keep users logged in securely
- MFA: multi-factor authentication for finance and admin roles
Role-based access control (RBAC) is essential. Not every team member should see everything.
| Role | Permissions |
|---|---|
| Admin | Full access: settings, team, payouts, disputes |
| Finance | Payments, invoices, refunds, reports |
| Support | Customer lookup, payment status, refund requests |
| Viewer | Read-only: transactions, balances |
Applications generated with Rocket.new can implement role-based authentication using Supabase, which provides row-level security policies that enforce data access at the database level. If you want to understand how AI app builders handle authentication systems, that pattern applies directly here.
Stripe APIs You Need
Building a stripe dashboard clone means working with several Stripe API objects.
| API Object | Purpose |
|---|---|
| PaymentIntent | Tracks the lifecycle of a payment from creation to confirmation |
| Customer | Stores customer data, payment methods, and billing history |
| Subscription | Manages recurring billing, plan changes, and cancellations |
| Invoice | Generates and tracks billing records for subscriptions and one-time charges |
| Payout | Tracks fund transfers from Stripe balance to bank account |
| Refund | Processes full or partial refunds on charges |
| Dispute | Manages chargebacks and evidence submission |
| BalanceTransaction | Logs every financial event affecting the Stripe balance |
| Webhook Event | Real-time notifications for payment events |
| CheckoutSession | Hosted or embedded checkout flow |
Payment methods your dashboard should support: Cards, Apple Pay, Google Pay, ACH bank transfer, SEPA debit, Link (Stripe's one-click checkout), and BACS debit for UK markets.
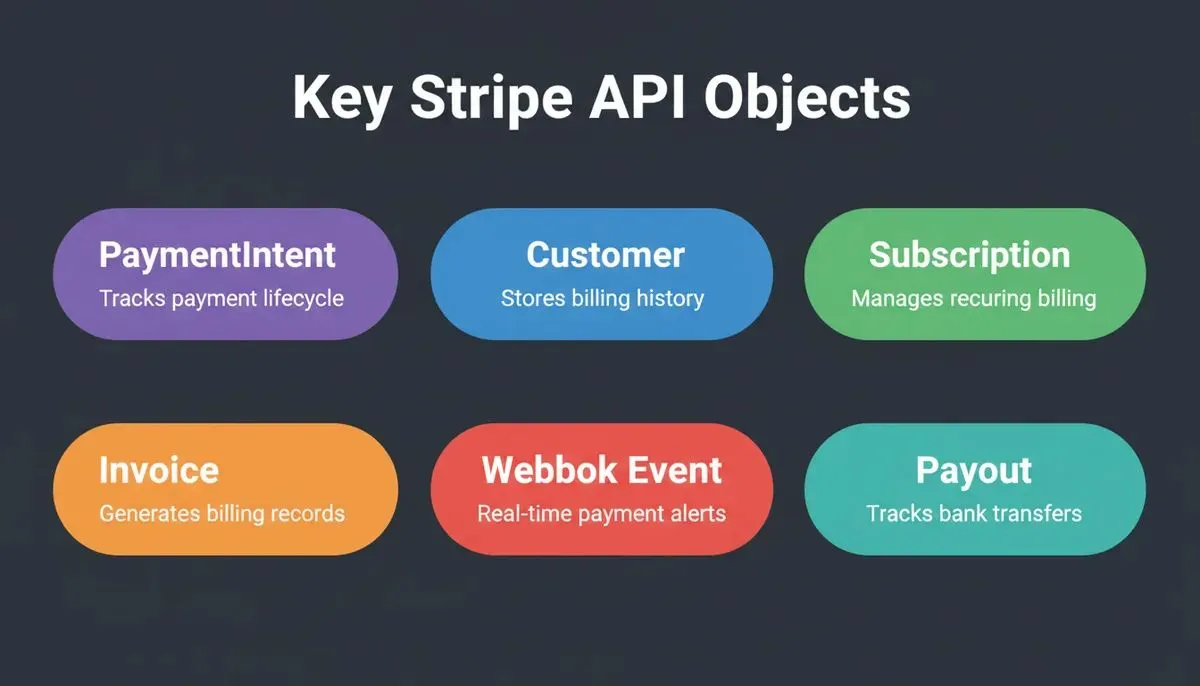
Key Stripe API Objects: PaymentIntent, Customer, Subscription, Invoice, Webhook Event, Payout as colored pills
Data Flow and Architecture
Behind the scenes, data drives everything. If the data flow is messy, the dashboard will reflect that. The app retrieves data from Stripe APIs via HTTPS, keeping payment details secure across the system.
Stripe dashboard clone data flow: from authentication through Stripe API and webhooks to the rendered dashboard.
Typical Tech Stack
| Layer | Example |
|---|---|
| Frontend | Next.js / React |
| Backend | Node.js / API routes |
| Database | PostgreSQL (via Supabase) |
| Auth | Supabase Auth (OAuth, email, MFA) |
| Payments | Stripe API |
| Webhooks | Stripe webhook endpoints |
| Deployment | Netlify (automatic HTTPS) |
The platform should also support multiple Stripe accounts when a business runs more than one brand. Switching between accounts should feel smooth, not risky or confusing.
Webhooks: Keeping Data in Sync
Webhooks are what keep a stripe dashboard clone accurate in real time. Without webhooks, your dashboard only reflects data when a user refreshes. With webhooks, every Stripe event updates your database instantly.
Key webhook events to handle:
| Event | What It Means |
|---|---|
| checkout.session.completed | A payment was successfully completed |
| customer.subscription.updated | A subscription plan changed |
| customer.subscription.deleted | A subscription was cancelled |
| invoice.payment_failed | A recurring payment failed — trigger dunning |
| invoice.payment_succeeded | A subscription payment went through |
| charge.dispute.created | A chargeback was filed |
| payout.paid | Funds landed in the bank account |
According to Stripe's webhook documentation, every production integration should handle webhook events idempotently, meaning the same event processed twice should not create duplicate records.
Practical lessons from webhook implementation:
- Always verify the webhook signature using
stripe.webhooks.constructEvent()before processing - Store raw webhook payloads before processing them, this makes debugging much easier
- Use a queue for high-volume events to avoid timeouts
- Test with the Stripe CLI using
stripe listen --forward-to localhost:3000/api/webhooks
Security: What Every Stripe Dashboard Needs
Payment dashboards handle sensitive financial data. Security is not optional.
PCI DSS compliance: Stripe handles card data directly, so your dashboard never touches raw card numbers. This keeps you out of PCI scope for cardholder data, but you still need to protect API keys, customer data, and session tokens.
Security checklist for a stripe dashboard clone:
- Store Stripe Secret Keys in environment variables, never in source code or chat
- Use HTTPS for all API calls and dashboard routes
- Implement row-level security (RLS) in Supabase so users only see their own data
- Enable MFA for admin and finance roles
- Log all sensitive actions in an audit trail
- Rotate API keys immediately if they are ever exposed
- Use Stripe's test mode keys during development, never test with live keys
- Validate webhook signatures on every incoming event
Encryption: Supabase encrypts data at rest. All Stripe API communication uses TLS. Session tokens should be short-lived with refresh logic. For a deeper look at securing apps before launch, the SaaS security checklist covers these patterns in full.
Performance Considerations
A stripe dashboard clone with thousands of transactions needs to handle data efficiently.
Pagination: The Stripe API returns data in pages of up to 100 objects. Build your UI to handle paginated lists, never try to fetch all transactions at once.
Caching: Cache expensive API calls like balance summaries and analytics aggregates. A 60-second cache on balance data is usually acceptable and dramatically reduces API calls.
Lazy loading and background sync: Load transaction details only when a user clicks into a record. Run webhook processing and analytics aggregation in background jobs, not in the request-response cycle. This keeps the UI fast even when processing large volumes.
Designing the Interface
Clean beats clever every time. Simple cards work best for quick numbers. Tables handle data well. Filters help users find what they need without scrolling forever.
Use:
- Clear headings
- Consistent spacing
- Friendly labels
Many founders check revenue on a mobile device while waiting in line for coffee. If the dashboard works well on a phone, it has already passed an important test. Building a responsive, mobile-ready app from the start saves significant rework later.
Stripe Dashboard vs Other Payment Dashboards
Stripe Dashboard vs Shopify Admin
Shopify Admin combines product management with payments. A Stripe dashboard clone is purely financial, no inventory, no product catalog. For pure payment operations, Stripe's data model is more flexible and developer-friendly.
Stripe Dashboard vs Square Dashboard
Square is optimized for point-of-sale and in-person payments. Stripe is built for online and programmatic payments. A Stripe clone is better suited for SaaS, subscriptions, and API-driven payment flows.
Stripe Dashboard vs PayPal Dashboard
PayPal's dashboard is consumer-facing and harder to customize. Stripe's API is developer-first, making custom clones far more practical. Stripe also has better subscription and webhook support.
Stripe Dashboard vs Custom Admin Panel
A fully custom admin panel gives maximum flexibility but takes months to build. A Stripe dashboard clone built with AI tools can reach production quality in days while still being fully customizable. Teams building internal tools with AI follow exactly this pattern.
Example Payment Data Table
| Payment ID | Customer | Amount | Status | Date |
|---|---|---|---|---|
| pay_001 | John D | $120 | Paid | Jan 10 |
| pay_002 | Sara K | $89 | Failed | Jan 11 |
| pay_003 | Alex R | $240 | Paid | Jan 12 |
| pay_004 | Maria L | $350 | Refunded | Jan 13 |
| pay_005 | Tom W | $75 | Disputed | Jan 14 |
This table helps you review payments quickly, spot failed payments, and track refunds without digging through multiple screens.
How to Build a Stripe Dashboard Clone with Rocket.new
Rocket.new is an AI-powered app builder that generates full-stack applications from conversational prompts. It has a native Stripe connector that generates complete checkout experiences, pricing pages, payment forms, webhook handlers, and subscription management, from a single prompt.
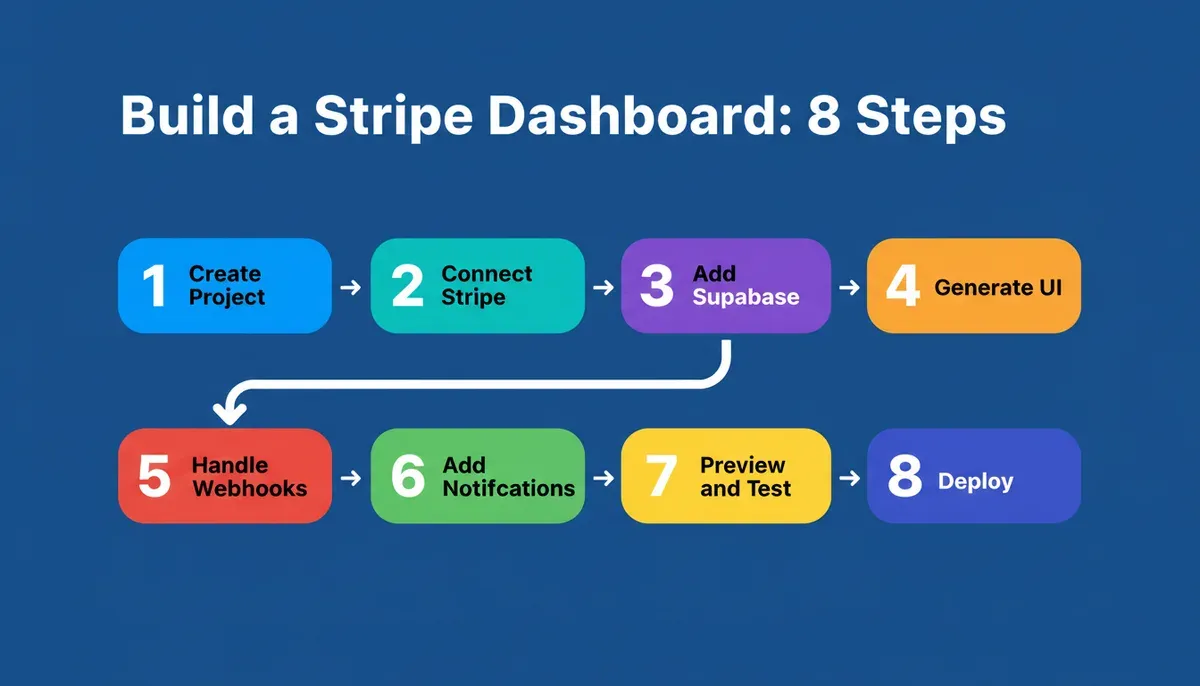
The complete 8-step workflow for building a production Stripe dashboard clone with Rocket.new.
Step 1: Create a Rocket.new Project
Sign up at Rocket.new and create a new project. Describe your dashboard in plain language: "Build a Stripe payment dashboard with a transactions list, customer management, subscription overview, payout tracking, and an analytics section showing MRR and failed payment rate." Rocket.new's AI generates the initial application structure from this description alone.
Step 2: Connect Stripe
In the Rocket.new editor, type a prompt mentioning Stripe. Rocket.new detects the intent and shows a Connect button. Click it, paste your Stripe Secret key and Publishable key from the Stripe API keys page, and save. Always start with Test mode keys. Switch to Live keys only when you are ready to accept real payments.
Step 3: Connect Supabase for Authentication
Rocket.new links Stripe customers to authenticated Supabase users automatically. Connect Supabase first to enable user accounts, role-based access, and row-level security on your payment data.
Step 4: Generate the Dashboard UI
Iterate through chat to build each section. Add payments tables, subscription pages, analytics cards, and role-based access controls through natural language prompts.
Step 5: Handle Webhooks
Rocket.new generates webhook handlers automatically when you describe event-driven flows. Rocket.new sets up the necessary webhook handlers for events like checkout.session.completed and customer.subscription.updated automatically.
Step 6: Add Notifications
Pair Rocket.new with Resend or SendGrid for transactional email delivery. Prompt: "Send an email notification when a payout is completed. Show an in-app alert when a payment fails."
Step 7: Preview and Test
Use Rocket.new's live preview to test every flow with Stripe test cards. Use 4242 4242 4242 4242 for successful payments and 4000 0000 0000 9995 to simulate a declined card.
Step 8: Deploy
Rocket.new deploys to Netlify with one click, providing a live URL, automatic HTTPS, and global CDN hosting. Connect a custom domain from the editor when you are ready to go live.
Rocket.new Features for Building Stripe Dashboards
- Stripe connector: generates checkout experiences, subscription management, webhook handlers, invoice generation, coupon codes, and usage-based billing from a single prompt
- Supabase integration: Postgres database, user authentication (OAuth, email, MFA), row-level security, and storage
- AI-generated full-stack apps: Next.js frontend and backend API routes generated from conversational prompts
- Role-based authentication: implemented in the generated stack using Supabase Auth and RLS policies
- Automatic HTTPS: via Netlify deployment
- Webhook handlers: generated automatically for Stripe events
- Iterative editing: refine any screen or feature through chat without restarting
- GitHub sync: two-way code sync for teams that want to maintain a repository alongside AI edits
- Visual edit: click any element in the preview to update text, spacing, or styling directly
You can also explore how to build a Stripe payment integration with an AI app builder for a deeper look at connecting Stripe APIs to custom dashboards. For teams building SaaS billing on top of this, the SaaS billing platform guide covers the full subscription lifecycle.
Use Cases: Who Builds Stripe Dashboard Clones
| Use Case | Key Features Needed |
|---|---|
| SaaS billing dashboard | Subscriptions, MRR, churn, upgrade/downgrade |
| Multi-vendor marketplace | Stripe Connect, split payouts, vendor dashboards |
| Agency client billing | Per-client invoices, payment history, portal access |
| Internal accounting | Revenue reconciliation, payout scheduling, audit logs |
| CRM payment management | Customer payment history, failed payment follow-up |
| Ecommerce analytics | Order-level data, refund analytics, fraud signals |
| Creator monetization | Donation tracking, membership billing, payout management |
| Membership websites | Subscription tiers, access control, renewal management |
| Donation platforms | One-time and recurring donations, campaign totals |
| B2B invoicing | Net-30 terms, ACH payments, invoice status tracking |
Testing and Review Phase
Before launching the dashboard, review everything carefully. A small oversight here can turn into big headaches later.
Testing checklist:
- Use Stripe test card 4242 4242 4242 4242 for successful payments
- Use 4000 0000 0000 9995 to simulate a declined card
- Trigger webhook events using the Stripe CLI
- Test role-based access by logging in as each user type
- Verify that failed payments trigger the correct UI state
- Confirm that payouts show the correct bank account and schedule
Also, confirm that bank account setup is working and that payouts are landing on time. Nothing kills trust faster than missing funds. Finally, ask a real user to explore the screen, fresh eyes often catch tiny issues that the dev team might have missed.
Support and Long-Term Growth
After launch, support is key. A dashboard is only useful if teams can actually work with it.
The dashboard should help support teams:
- Review customer history: see past payments and interactions at a glance
- Resolve payment issues: handle failed payments or disputes quickly
- Track invoices: keep billing organized and easy to follow
Over time, add features gradually. Import historical data, customize views, and keep the interface clean. Consistent support and incremental improvements make the dashboard a tool people actually enjoy using, not just another screen to check. Teams that want to scale beyond dashboards can explore how to scale SaaS built with AI tools for the next phase of growth.
Ready to build your own payment dashboard without weeks of development time?
Rocket.new makes it easy to design, connect, and launch a production-ready stripe dashboard clone, with Stripe API integration, webhook handlers, role-based access, and automatic HTTPS built in. Start building for free on Rocket.new and ship your dashboard faster than you thought possible.
Table of contents
- -What Is a Stripe Dashboard Clone?
- -How Many Businesses Use Stripe?
- -Stripe Dashboard Clone vs Building From Scratch
- -Stripe Dashboard Clone vs Stripe Embedded Components
- -Who Needs a Stripe Dashboard Clone?
- -The First Section: Planning the Dashboard Structure
- -Core Features to Include
- -Payments and Customers
- -Payouts and Balances
- -Refunds and Disputes
- -Subscriptions and Billing
- -Analytics and Revenue Metrics
- -Stripe Dashboard Clone Feature Comparison
- -Authentication and Access Control
- -Stripe APIs You Need
- -Data Flow and Architecture
- -Typical Tech Stack
- -Webhooks: Keeping Data in Sync
- -Security: What Every Stripe Dashboard Needs
- -Performance Considerations
- -Designing the Interface
- -Stripe Dashboard vs Other Payment Dashboards
- -Stripe Dashboard vs Shopify Admin
- -Stripe Dashboard vs Square Dashboard
- -Stripe Dashboard vs PayPal Dashboard
- -Stripe Dashboard vs Custom Admin Panel
- -Example Payment Data Table
- -How to Build a Stripe Dashboard Clone with Rocket.new
- -Step 1: Create a Rocket.new Project
- -Step 2: Connect Stripe
- -Step 3: Connect Supabase for Authentication
- -Step 4: Generate the Dashboard UI
- -Step 5: Handle Webhooks
- -Step 6: Add Notifications
- -Step 7: Preview and Test
- -Step 8: Deploy
- -Rocket.new Features for Building Stripe Dashboards
- -Use Cases: Who Builds Stripe Dashboard Clones
- -Testing and Review Phase
- -Support and Long-Term Growth