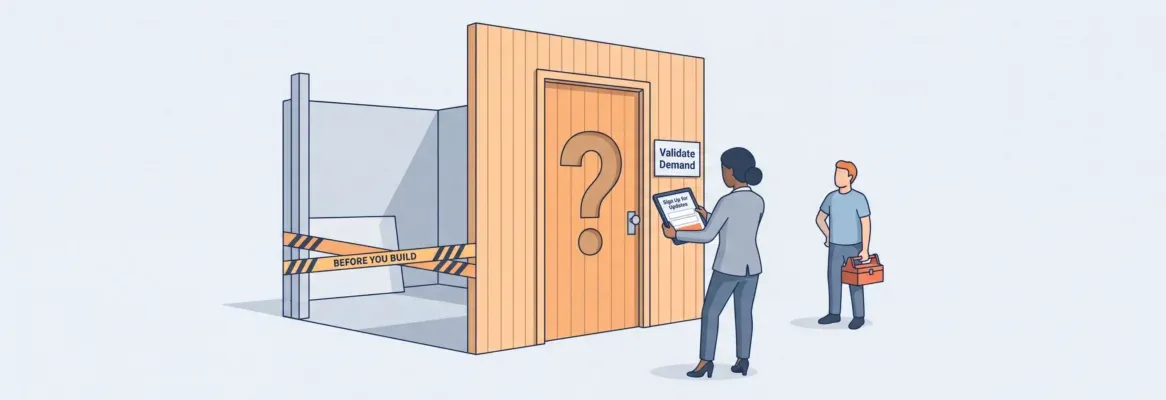
Fake door testing measures real demand by showing users a feature that doesn't exist yet. It saves months of wasted development on ideas nobody wants. Pair it with Rocket.new to validate, build, and monitor your product without writing a single line of code.
How much does it really cost when a product team builds something nobody ends up using? According to MIT research, 88% of AI pilots never reach production, and most of those teams never validated demand before they started building. That's months of developer hours, infrastructure spending, and opportunity cost that could have been avoided with a simple test.
A fake door test answers the most fundamental product question: do people actually want this? You place a UI element that looks like a real feature, count who clicks on it, and use that behavioral data to decide whether the idea is worth building. No code. No design sprints. Just a clear demand signal.
This guide walks through exactly how to set up and run your first test, what metrics to track, and how to turn validated demand into a shipped product fast.
How Does a Fake Door Test Actually Work?
A fake door test is a demand validation method that places a non-functional UI element in your product or website to measure genuine user interest before any code is written. The element could be a button, a menu item, a banner, or a landing page CTA. When a user clicks on this fake door, they land on a reveal page explaining the feature is coming soon.
- The "door" is any clickable UI element that presents a proposed feature or product as if it already exists in your existing workflow
- User clicks get recorded as a demand signal, showing genuine interest without requiring you to build a real feature first
- The reveal page shows a message explaining the feature is still in development, often with a waitlist signup or short survey
- Painted door testing is just another name for the same method, referring to the idea of painting a door on a wall that nobody can actually walk through
The concept is simple: show something that looks real, see who tries to use it, and count the user interactions. You get behavioral data about actual demand without investing significant resources into development.
This is different from surveys or customer interviews because user clicks represent action, not just stated preference. People tell you one thing in interviews but do something completely different when a button appears in their existing workflow.
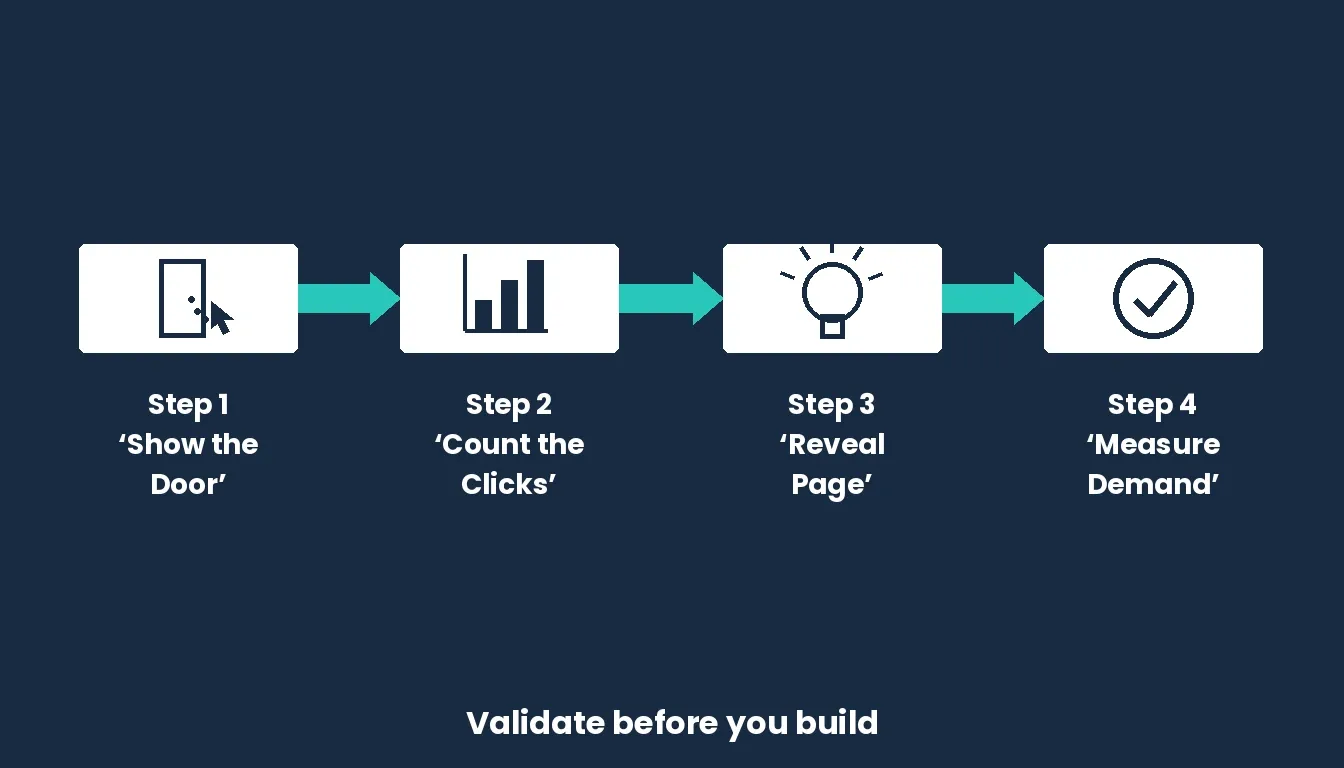
The fake door testing workflow: from UI element to demand signal in four steps
Fake Door Test vs. MVP vs. Smoke Test vs. Concierge Test
Before running any validation experiment, it helps to know which method fits your situation. These four approaches are frequently confused but serve different purposes.
| Method | What You Build | What You Measure | Best For |
|---|---|---|---|
| Fake door test | A non-functional UI element (button, link, banner) | Click through rate and waitlist signups | Validating demand for a specific feature before writing code |
| Smoke test | A landing page describing the product | Email signups or pre-orders | Validating demand for an entire product concept |
| MVP | A minimal but functional version of the product | Real usage, retention, and revenue | Validating whether users will actually use and pay for the thing |
| Concierge test | You manually deliver the service yourself | Customer satisfaction and willingness to pay | Validating whether the problem is real and the solution fits |
A fake door test sits at the earliest stage of this stack. It costs almost nothing and answers one question fast: is there enough interest to justify building at all? Once the fake door confirms demand, you move to an MVP or a smoke test to validate the full product.
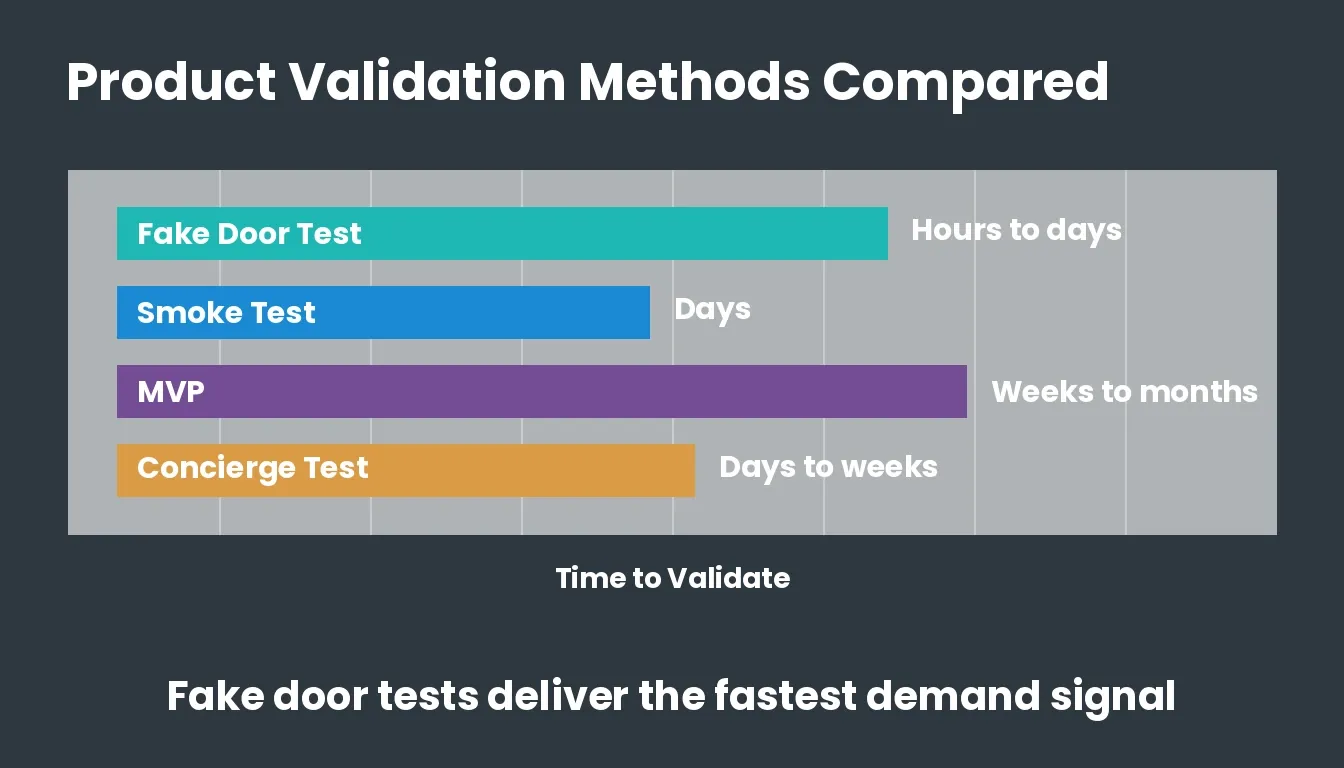
Fake door tests deliver the fastest demand signal of any validation method
Why Do Product Teams Run Fake Door Tests?
Product teams run fake door tests to get hard behavioral evidence before committing developer resources to a feature idea. Building a new feature takes weeks or months. Discovering nobody wanted it after the fact is a painful, expensive mistake.
They Validate Demand Without Writing Code
The core appeal is speed: you can gauge user interest and validate demand for a feature idea before a single developer starts working on it. A well-placed fake door delivers a demand signal in days rather than months of building, saving time and money.
- Behavioral data over opinions: User clicks prove genuine interest in ways that surveys cannot, because people are acting inside the product rather than answering hypothetical questions
- Minimal investment required: A button, a page, and some analytics tracking. That's all you need to measure whether sufficient demand exists for a proposed feature
- Fast iteration cycles: If testing demand reveals weak demand for one concept, you can pivot and test another feature idea within the same week
Harvard Business School professor Clayton Christensen estimated that 95% of new product ideas fail in the market. A fake door test helps teams decide whether an idea is worth developing before they spend months on it.
They Avoid Wasting Developer Hours
Every wasted effort building something nobody uses has a real cost. According to MIT research, 88% of AI pilots never reach production, and most never tested demand before building. That's months of developer time, infrastructure cost, and opportunity cost gone.
- Testing demand early eliminates the risk of investing significant resources into features your user base doesn't care about
- The demand signal is binary: either people click and express interest, or they don't. No ambiguity, no guessing about market fit
They Build Qualified Beta Waitlists
Users who click a fake door have already demonstrated behavioral evidence of intent. They're far more qualified for beta access than users recruited through cold outreach or pop-ups.
- Early access cohorts sourced from fake door clickers tend to provide richer feedback because they already wanted the feature
- Waitlist signups let you gauge interest levels and build an audience before you even start development
Once your fake door test confirms sufficient demand, the next step is moving from market validation to a deployed product. Understanding how AI is changing product development can help you close that gap faster than traditional methods allow.
How to Run Your First Fake Door Test Step by Step
Running a fake door test step by step isn't complicated, but careful planning matters. Here's the process that most fake door tests follow when done well.
Fake door test decision flow: from hypothesis to build decision
Define Your Hypothesis and Set a Threshold
Before you build anything, write down exactly what you expect to happen. A clear hypothesis might look like this: "If we show a 'Try AI Reports' button to power users, at least 5% will click within two weeks."
- Set the threshold before launch so you can't move goalposts after seeing results
- Base it on your user base size and the minimum number of signups that would justify development cost
- A reasonable threshold for in-product tests targeting relevant users is around 5% click-through rate from the target audience
Build the Door
Create the UI element that presents your proposed feature. This could be a button label in navigation, a menu item in your app's sidebar, a banner on your homepage, or a standalone landing page test.
- Keep copy specific and believable. A vague label attracts curiosity clicks from casual users rather than genuine interest
- Match the page location and design to your existing product so it doesn't feel like an ad or a disruption
- The element should describe the new feature in terms of what the user gets, not what you're building internally
Drive Representative Traffic
Send the right audience to your fake door. For in-app tests, that means showing it to a targeted segment, not your entire user base. For a landing page test, run ads targeting people who match your ideal customer.
- Avoid external traffic that doesn't match your target audience. Friends and family will click out of support, not demand
- Power users and free tier users behave differently, so segment your test accordingly
- Run the test for one to two weeks to collect enough data for a confident read
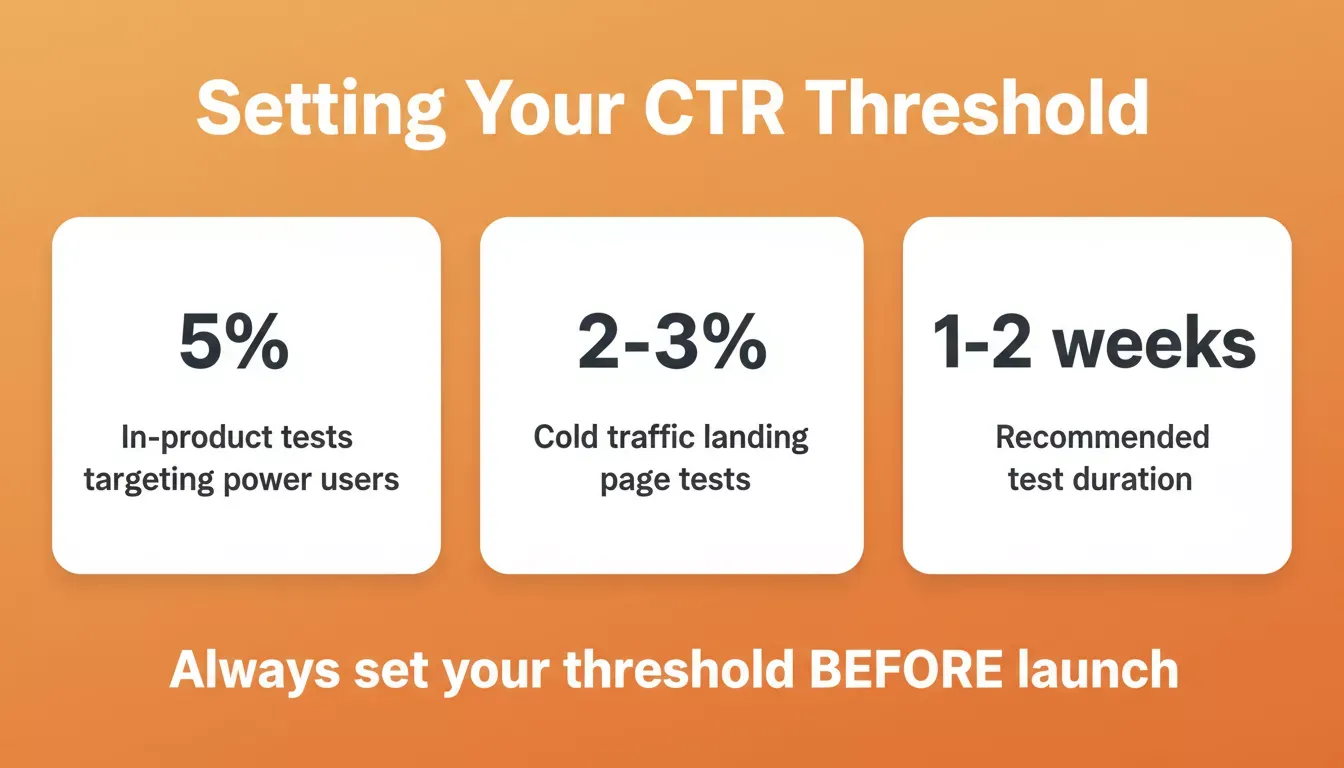
Key benchmarks for setting your pass-fail threshold before launch
Capture User Clicks and Actions
Record every interaction. Track who clicked, what plan level they're on, how long they've been a customer, and what they did before and after clicking.
- Click data alone tells you curiosity, not commitment. Pair it with post-click behavior like form fills or email submissions
- Custom events in your analytics tool let you see how many users clicked versus how many completed the follow-up action
- Look at post-click message engagement: did users read the reveal page, or did they bounce immediately?
Show an Honest Reveal Page
When a user clicks the fake door, they land on a page with a message explaining the feature isn't available yet. This is where honesty matters most for customer trust.
- Thank users for their interest and explain you're gathering feedback before building
- Offer a waitlist signup or short survey so you capture deeper intent beyond the initial click
- Never take payment for something that doesn't exist. This is a demand signal test, not a scam
- A good reveal page provides a clear path back into the product so the experience isn't frustrating users
Compare Results Against Your Threshold
After the test window closes, compare your data to the hypothesis you wrote in step one. Did click-through rate meet or exceed the threshold? Segment results by user types to find patterns.
- High CTR from enterprise customers but low CTR from casual users tells you this is a premium feature, not a broad one
- Follow-up interviews showed why people clicked and what they expected, adding context to raw numbers
- The outcome decides your next step: build it, iterate on the concept, or drop the idea entirely
What Metrics Should You Track From Fake Door Test Results?
Most fake door tests live or die by how well teams measure interest afterward. Raw click-through rate is just the starting point. Here's what to track and how to tell a strong demand signal from noise.
Click Through Rate by Segment
Don't look at aggregate CTR alone. Break it down by user types: power users, casual users, free tier users, enterprise customers. A 4% overall CTR might hide a 12% rate from your most valuable segment.
- Power users click at higher rates when the proposed feature solves a pain point they've already reported
- Casual users and free tier users might click out of curiosity rather than genuine purchase intent
- Enterprise customers clicking at above-threshold rates signal willingness to pay for new functionality
Post-Click Behavior and Follow-Through
The real metrics come after the click. How many users left an email? How many filled out a survey? Post-click behavior separates curiosity clicks from real demand.
- Email capture rate shows how many users are willing to commit personal information for early access or beta access
- Survey completion rate indicates user engagement depth beyond a casual click
- Time on reveal page tells you if people read your message explaining the feature or bounced immediately
Advanced Analytics and Key Metrics
Go beyond clicks. Track how many users came back to check for updates, whether they mentioned the feature in support tickets, and if click data correlates with other user behavior patterns.
| Dimension | Strong Signal | Weak Signal |
|---|---|---|
| Click-through rate | Meets or beats pre-set threshold | Well below threshold despite relevant traffic |
| Who clicked | Target audience from cold traffic | Friends, team, or untargeted curiosity clicks |
| Follow-through | Users leave email or join a waitlist | Clicks but no one commits a single detail |
| Consistency | Demand holds across multiple channels | One lucky channel, nothing repeatable |
| Segment depth | High engagement from paying customers | Only free users showed interest |
When fake door test results show strong signals across all dimensions, you have sufficient demand to move forward. When signals are weak, the data is telling you something and it's cheaper to hear it now than after months of building.
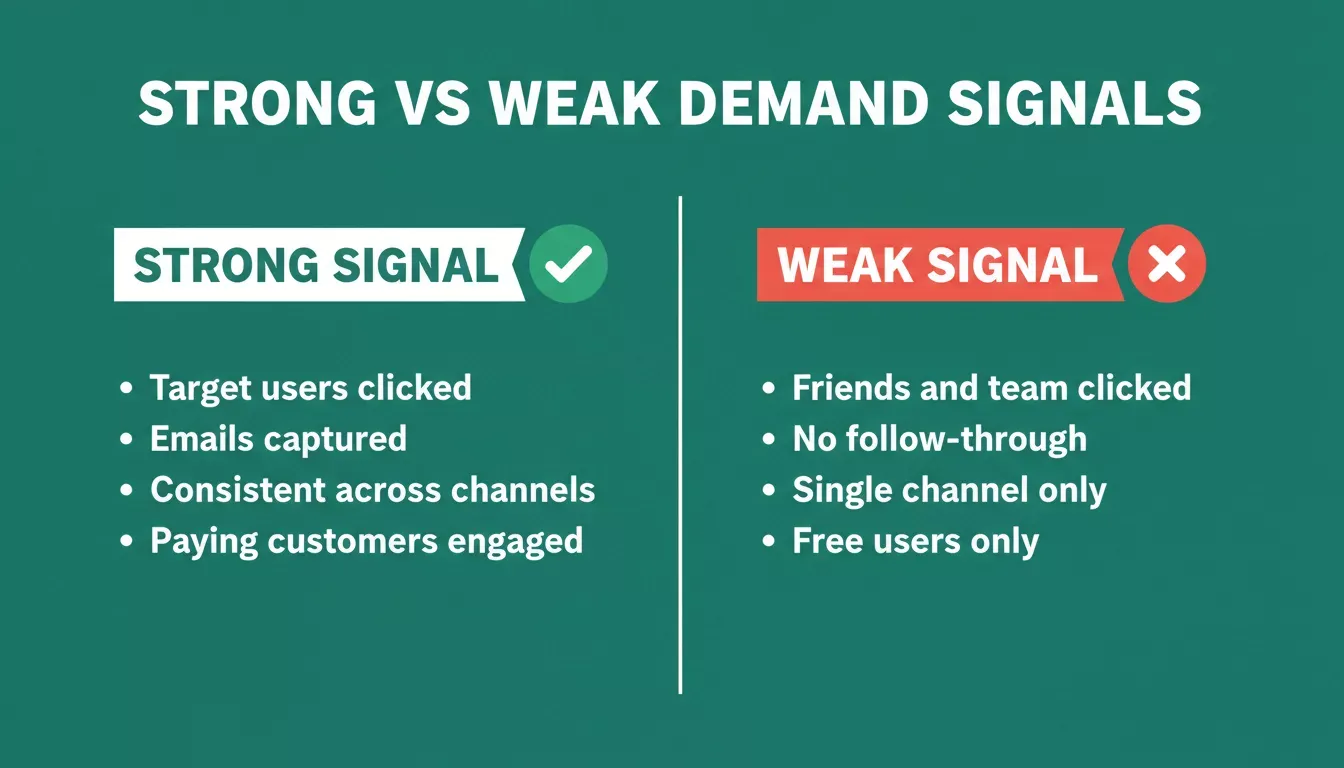
Distinguishing genuine demand signals from curiosity clicks in your test results
Coursera's painted door guide offers a good overview of how this method fits into the broader product development process and UX research platform choices.
From Fake Door to Shipped Product: How Rocket Closes the Gap
Your fake door test worked. You have a demand signal, a waitlist, and click data confirming people want what you described. Now what?
The traditional path takes weeks: scoping, design, sprint planning, development, QA, deployment. By the time you ship, the enthusiasm from your waitlist has cooled. Many teams lose momentum here because the gap between "validated idea" and "working product" is still months wide.
Rocket.new is a vibe solutioning platform built specifically to close that gap. It combines three capabilities: Solve for strategic research, Build for AI-powered app creation, and Intelligence for competitive monitoring. Each pillar maps directly to a phase of the fake door workflow.
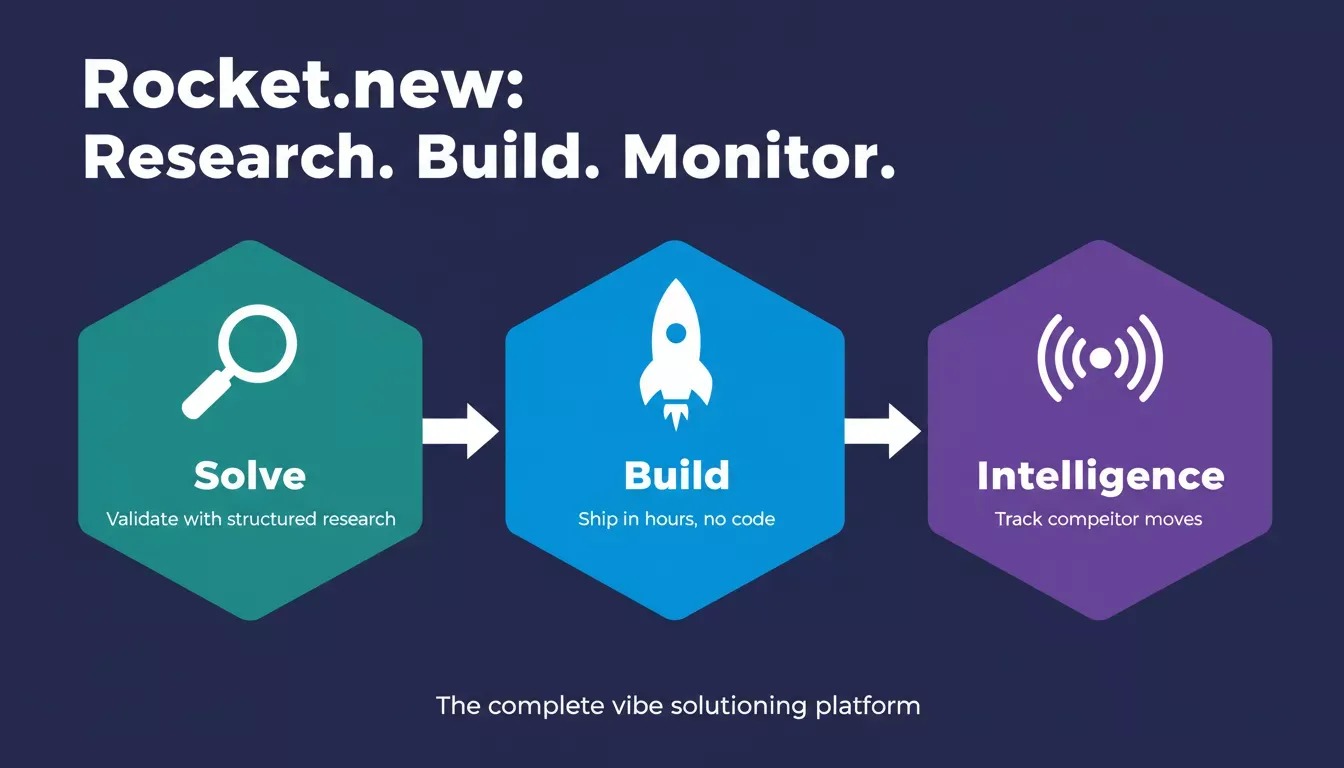
Rocket.new combines research, building, and competitive monitoring in one platform
Solve: Validate Further Before You Build
After your fake door confirms interest, Solve lets you go deeper before committing to a sprint. Ask Solve a structured business question, and it returns an evidence-backed research report with market data, competitive analysis, and recommendations. You can generate a PRD directly from the Solve output and hand it to Build with full context intact.
This is the step most teams skip. They see a 7% CTR and start coding. Solve turns that signal into a strategy.
Build: Ship a Working Prototype in Hours
Once validated, Build turns your concept into a production-ready app in hours, not weeks. Describe what you want in plain language, and Rocket generates a working version you can customize and ship with no code required. Product teams, designers, and founders can all iterate without waiting in a developer queue.
Build includes built-in analytics (powered by Google Analytics or Mixpanel connectors), so you keep measuring real user behavior after the fake door phase ends. It also ships with landing page templates so your next iteration of the fake door itself can go live the same day your test results come in.
Unlike tools that generate throwaway prototypes, Rocket builds production-ready apps you can actually ship to customers. The docs describe it as going from idea to deployed app in under five minutes for a quick start, and hours for a full build.
Intelligence: Track Whether Competitors Respond
After you ship, Intelligence watches what your competitors do next. It monitors nine signal pillars including product changes, hiring velocity, pricing shifts, GTM moves, and social signals. It then delivers structured Intel cards when a competitor makes a move that matters to your strategy.
If your fake door validated a feature your competitors don't have yet, Intelligence tells you the moment that changes. You built fast because Rocket helped you validate fast. Intelligence makes sure you stay ahead.
"Most teams optimise for volume, but the most successful ones we work with optimise for qualification." - Future Foundry on LinkedIn
The fake door proved demand. Rocket's three-pillar workflow- Solve, Build, Intelligence- proves you can deliver on it and defend it.
Common Mistakes That Kill Fake Door Tests
Even with solid methodology, many teams get their results wrong because of avoidable errors. Here are the most common pitfalls and how to avoid them.
Writing Misleading Copy That Damages Trust
The biggest mistake is making your fake door look too polished or too promising. If your button label says "Start Your AI Report Now," users expect to get an AI report. When they see a coming soon page instead, they feel deceived and lose trust.
- Write copy that signals interest, not availability. "Interested in AI reports?" works better than "Get your report now"
- The distinction matters: genuine interest from honest framing beats inflated clicks from misleading copy that ends up frustrating users later
- Overpromising in fake doors damages customer trust for future tests and product launches, creating long-term harm for short-term vanity metrics
Targeting the Wrong Audience
Showing your fake door to your entire user base dilutes the signal. Not everyone is a relevant user for every feature idea. When casual users and power users get the same test, you can't separate curiosity from conviction.
- Limit frequency and exposure. Show the test to one segment of relevant users, typically 5-10% of your target audience
- Match the segment to the feature. A data export feature should target users who already work with large datasets, not new signups
- Free tier users and enterprise customers have completely different willingness to pay, so their clicks mean different things
Ignoring Follow-Up Interviews and Qualitative Data
Raw click data tells you what happened. Follow-up interviews tell you why. Teams that skip this step miss the context that turns a number into a roadmap decision.
- Schedule follow-up interviews with five to ten users who clicked. Ask what they expected, what problem they were trying to solve, and what they'd pay
- Follow-up interviews showed richer insights when conducted within a week of the test, while memory is fresh
- Combine click data with qualitative feedback. High CTR with negative interview sentiment is a false positive that many teams miss
Userpilot's guide to fake door testing covers additional frameworks for structuring follow-up research after your initial demand validation.
Demand Data Beats Developer Hours Every Time
Product teams that test before they build consistently ship features people actually use. The method is simple, cheap, and fast. It won't replace deep research or usability testing, but it gives you one clear demand signal before you commit months of work.
Start with a hypothesis, show the door, count who tries to walk through it, and let the data guide your next step. When the signal is strong and you're ready to build, Rocket gets you from validated idea to working product in hours. Intelligence monitoring keeps you ahead of competitors after you ship.
If you want to go deeper on the research side before building, explore how to do market research and validate your business idea. For teams thinking about the full journey from idea to launch, the rapid prototyping guide covers how to move fast once you have a validated signal.
Ready to turn your validated idea into a real product? Sign up for Rocket and go from fake door to deployed app without writing a single line of code. Your test already proved people want it.
Table of contents
- -How Does a Fake Door Test Actually Work?
- -Fake Door Test vs. MVP vs. Smoke Test vs. Concierge Test
- -Why Do Product Teams Run Fake Door Tests?
- -They Validate Demand Without Writing Code
- -They Avoid Wasting Developer Hours
- -They Build Qualified Beta Waitlists
- -How to Run Your First Fake Door Test Step by Step
- -Define Your Hypothesis and Set a Threshold
- -Build the Door
- -Drive Representative Traffic
- -Capture User Clicks and Actions
- -Show an Honest Reveal Page
- -Compare Results Against Your Threshold
- -What Metrics Should You Track From Fake Door Test Results?
- -Click Through Rate by Segment
- -Post-Click Behavior and Follow-Through
- -Advanced Analytics and Key Metrics
- -From Fake Door to Shipped Product: How Rocket Closes the Gap
- -Solve: Validate Further Before You Build
- -Build: Ship a Working Prototype in Hours
- -Intelligence: Track Whether Competitors Respond
- -Common Mistakes That Kill Fake Door Tests
- -Writing Misleading Copy That Damages Trust
- -Targeting the Wrong Audience
- -Ignoring Follow-Up Interviews and Qualitative Data
- -Demand Data Beats Developer Hours Every Time